If you live in a home or building made of brick, you’ve probably heard of tuckpointing and repointing. Both are important ways to keep your brick walls looking great and, more importantly, standing strong. But how do you know which one you need? Let’s dive into what each one is and how they’re different, so you can make the best choice for your home or property.
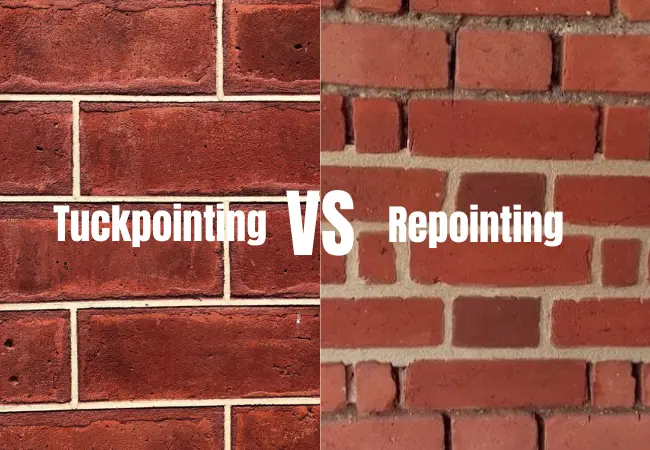
What Is Tuckpointing?
Tuckpointing is all about making your brick wall look better. Over time, the mortar (the material between the bricks) can wear out or become uneven. Tuckpointing involves filling in the old mortar with new mortar that matches the brick color and then adding a thin line of contrasting mortar to give it a clean, fresh look. This process makes it seem like your brickwork has perfectly straight, even lines.
While it does make your brick wall look sharper, tuckpointing isn’t just about looks. It also helps protect the joints from weather damage, which can keep your wall in good condition longer.
How Tuckpointing Works
- Cleaning the Joints: First, the old, damaged mortar is carefully removed.
- Adding New Mortar: New mortar is applied, matching the brick’s color as closely as possible.
- Tucking In Lines: A thin line of contrasting mortar is placed in the middle of the joint to create the appearance of a neat, uniform finish.
- Smoothing It Out: The last step is smoothing out the joints, so everything looks crisp and tidy.
Tuckpointing is mostly used when your brick wall looks worn out, but the structure is still strong.
What Is Repointing?
On the other hand, repointing is used when the mortar in your brick wall is damaged or starting to fall apart. Over time, the mortar can crack or wear away due to weather and moisture. This weakens your wall and allows water to get in, which can lead to bigger problems like cracks or even collapse.
Repointing is the process of removing the old, crumbling mortar and replacing it with fresh mortar to make your wall strong again. Unlike tuckpointing, repointing focuses more on repairing the structure of the wall than on making it look better.
How Repointing Works
- Checking the Joints: A careful inspection is done to see where the mortar is failing.
- Removing the Old Mortar: The damaged mortar is scraped out, being careful not to harm the surrounding bricks.
- Applying Fresh Mortar: Fresh mortar is applied to the joints, matching the original look as much as possible.
- Finishing Up: The mortar is tooled to make sure it’s packed tightly and the joints are smooth.
Repointing is necessary when your wall is at risk of serious damage, and it helps keep the structure of your building safe and sound.
Differences Between Tuckpointing vs. Repointing: When to Choose Tuckpointing
| Aspect | Tuckpointing | Repointing |
|---|---|---|
| Purpose | Improves the look of the wall, adds protection. | Fixes damaged mortar, strengthens the wall. |
| Main Focus | Aesthetic improvement with some protection. | Structural repair to prevent further damage. |
| Materials Used | Two different colors of mortar for effect. | One color of mortar that matches the original. |
| When It’s Needed | When the wall looks old but is still strong. | When mortar is cracked or falling apart. |
| Cost | Can be more expensive for decorative reasons. | Generally more cost-effective for long-term repairs. |
Costs of Tuckpointing vs Repointing
You might be wondering, how much is all this going to cost? Well, the price varies depending on several factors like the size of the area, the materials needed, and labor costs. Here’s a general breakdown:
Tuckpointing Costs:
- Average cost: $5 to $25 per square foot, depending on the complexity of the job.
- Factors affecting cost: If you’re dealing with ornate or historic brickwork, expect the price to go up.
Repointing Costs:
- Average cost: $3 to $10 per square foot.
- Factors affecting cost: Extensive damage or needing to match original mortar closely can raise the price.
Which Is More Affordable?
The cost of tuckpointing versus repointing depends on the size of the project and the extent of the damage. While tuckpointing can sometimes be more expensive because of the detailed work required to create a decorative finish, repointing is often more necessary and cost-effective for the long-term health of your brick wall.
For example, if you let cracked mortar go without fixing it, it could lead to bigger problems like water damage or structural weakening, which would be more expensive to fix later on. So, while tuckpointing improves looks, repointing is the better investment if you want to avoid larger repairs.
When to Choose Truckpointing
Tuckpointing is best if:
- Your bricks are in good shape, but the mortar looks uneven or weathered.
- You want your brick wall to look sharp and clean without changing the structure.
- You’re concerned about curb appeal and want to add some value to your home.
When to Choose Repointing
Repointing is necessary if:
- You see cracks or crumbling in the mortar between your bricks.
- Your wall is starting to allow water to seep through, risking further damage.
- You want to make sure the structure of your wall is safe and sound before bigger problems arise.
Benefits of Tuckpointing
- Better Appearance: Tuckpointing can make your brick wall look brand new, even if it’s old. It’s a great way to boost curb appeal.
- Protection: While it’s mainly decorative, tuckpointing also provides some protection against water damage by sealing up the joints.
- Increases Property Value: A neat and well-maintained brick wall can increase the value of your property.
Benefits of Repointing
- Structural Stability: Repointing is essential to keep your walls strong and prevent them from falling apart.
- Prevents Water Damage: By replacing damaged mortar, repointing stops water from getting into the wall, which can lead to major issues down the road.
- Cost-Effective Long Term: Fixing mortar issues early can save you money in the long run, as it prevents bigger repairs from being needed.
Comparison Between Tuckpointing & Repointing Processes
Alright, let’s get down to the nitty-gritty of how these two masonry services actually work. Understanding the processes behind tuckpointing and repointing can help you appreciate the craftsmanship involved and maybe even impress your friends at your next backyard BBQ!
The Tuckpointing Process Unveiled
Tuckpointing isn’t just slapping some new mortar on your bricks—it’s a meticulous art form that enhances the beauty of your masonry. Here’s how it typically goes down:
- Assessment and Preparation
- Inspection: A professional mason starts by assessing the brickwork to determine the extent of the wear and tear.
- Color Matching: This is crucial! The mason selects a mortar color that closely matches the bricks and another color for the thin lines to create that sharp contrast.
- Removing Old Mortar
- Grinding Out Joints: Using specialized tools, the existing mortar joints are carefully ground out to a precise depth, usually about a quarter-inch.
- Cleaning: The joints are then cleaned to remove any dust or debris, ensuring the new mortar adheres properly.
- Applying the Base Mortar
- Filling Joints: The mason fills the joints with the base mortar that matches the brick color.
- Smoothing Out: The mortar is smoothed and left to set just enough to be firm but not fully hardened.
- Adding the Contrasting Mortar Lines
- Tucking in the Lines: A thin line of contrasting mortar is “tucked” into the center of the joints. This requires a steady hand and an eye for detail!
- Creating the Illusion: The result is a visual trick that makes the brickwork look like it has razor-thin, perfectly aligned joints.
- Finishing Touches
- Cleaning Up: Any excess mortar is cleaned off the bricks.
- Curing: The new mortar is left to cure properly, which is essential for durability.
The Repointing Process Demystified
Repointing might not be as flashy as tuckpointing, but it’s the unsung hero that keeps your walls from crumbling down. Here’s what the process entails:
- Initial Inspection
- Damage Assessment: The mason examines the brickwork to identify areas where the mortar has deteriorated.
- Planning: A strategy is devised to address the most critical areas first.
- Removing Damaged Mortar
- Raking Out Joints: The old, crumbling mortar is removed to a depth of about 1/2 to 1 inch using tools like chisels or grinders.
- Avoiding Brick Damage: This step requires precision to ensure the bricks themselves aren’t damaged in the process.
- Cleaning the Joints
- Washing Out Debris: The joints are cleaned with water to remove any remaining dust.
- Drying Time: The area is allowed to dry to ensure optimal adhesion of the new mortar.
- Preparing New Mortar
- Mixing Mortar: A new batch of mortar is mixed, often matched to the composition and color of the original mortar.
- Consistency Check: The mortar must have the right consistency—not too wet, not too dry.
- Filling the Joints
- Applying Mortar: The new mortar is carefully packed into the joints using pointing tools.
- Layering if Necessary: For deeper joints, the mortar is applied in layers to prevent sagging.
- Tooling and Finishing
- Shaping the Joints: The mason shapes the mortar to match the existing joint style, whether it’s concave, flat, or otherwise.
- Cleaning Excess Mortar: Any mortar smudges on the bricks are cleaned off before they harden.
- Curing
- Proper Drying: The fresh mortar is kept moist to cure slowly, which enhances strength.
- Final Inspection: Once cured, a final check ensures that the work meets structural and aesthetic standards.
Why the Process Matters
Understanding the detailed steps in tuckpointing vs repointing not only satisfies your curiosity but also highlights why hiring experienced professionals is so important. These aren’t quick fixes but intricate processes that require skill and attention to detail.
The Importance of Professional Expertise
You might be thinking, “Hey, could I DIY this?” While the adventurous spirit is admirable, tuckpointing and repointing are best left to the pros. Here’s why:
- Technical Skill: Both processes require precise techniques to avoid damaging the bricks or compromising the wall’s integrity.
- Proper Tools: Specialized tools are needed to remove old mortar and apply new mortar effectively.
- Safety Concerns: Working on brick walls, especially at heights, can be dangerous without proper safety equipment and training.
- Quality Results: Professionals ensure that the new mortar matches the old in composition and appearance, which is crucial for both aesthetics and durability.
GTA Masonry Provides the best Truckpointing and repointing services in Hamilton, Ontario.
Book a meeting to learn more about our services.
FAQs About Tuckpointing and Repointing
1. How long does tuckpointing last?
Tuckpointing can last anywhere from 20 to 30 years, depending on environmental conditions and the quality of the original job.
2. Can I DIY tuckpointing or repointing?
While it’s tempting to save money with a DIY approach, both tuckpointing and repointing require specialized skills. Improper techniques can lead to more damage, so it’s best to hire a pro.
3. How do I know if my building needs repointing?
Look for cracks, loose bricks, or crumbling mortar. If water is seeping into your home, that’s a huge red flag that your mortar needs attention.
4. Is repointing bad for old buildings?
Not if it’s done correctly! It’s essential to use the same type of mortar as the original to maintain the building’s integrity and appearance.
5. What’s the difference between mortar and cement?
Mortar is a mixture of cement, lime, and sand that’s used to bind bricks together. Cement is just one ingredient of mortar, typically used in larger-scale construction projects.