When you notice your bricks chipping or flaking, it’s important to address spalling before it worsens. You might wonder what causes this damage and how to fix it effectively. Understanding the underlying reasons, like moisture infiltration or freeze-thaw cycles, is vital. But what tools will you need, and how do you make sure the new bricks match the old ones? The process isn’t just about replacing damaged bricks; it’s about meticulous preparation and application. Let’s get into the key steps to restore both the stability and appearance of your brickwork.
Identifying Spalling Bricks
Recognizing spalling bricks early is crucial for preventing further damage to your building. When you spot those telltale signs like cracks, pitting, or crumbling surfaces, you’re already on the right path towards spalling prevention. It’s all about being vigilant and taking swift action. You don’t want your building to lose its charm or, worse, its structural integrity.
To effectively identify spalling, you can start with a close inspection of your brickwork. Look for areas where the brick surface seems to be flaking off or deteriorating. These are clear indicators that moisture has penetrated, causing the brick to weaken.
If you’re unsure, a professional assessment can give you peace of mind. Experts have the tools and knowledge to pinpoint the severity of the spalling and suggest appropriate solutions.
However, don’t feel like you’re on your own. There are plenty of DIY options available too. Simple actions like applying a water-repellent sealant or ensuring proper drainage around your building can make a big difference.
Causes of Brick Spalling
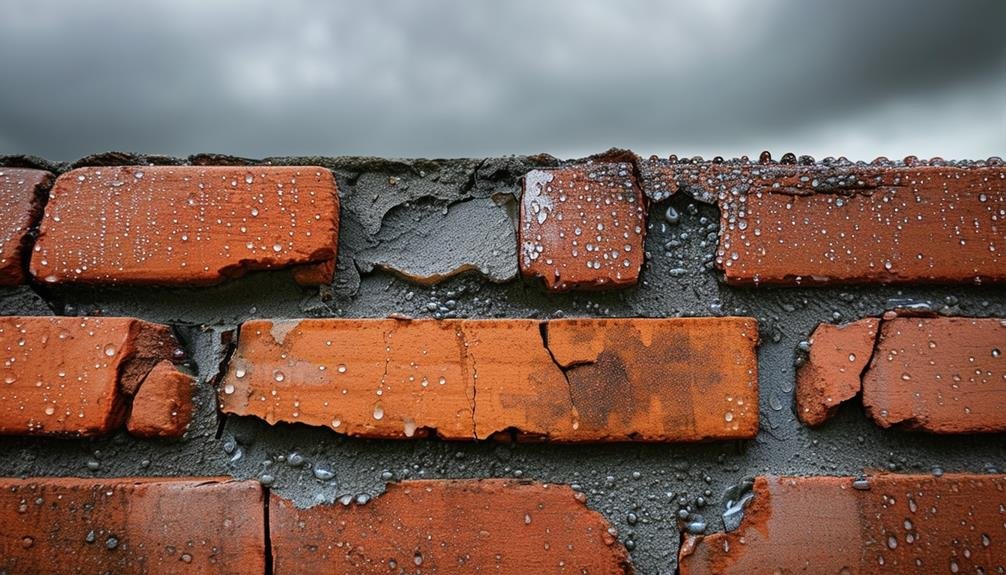
Brick spalling often starts with moisture infiltration from rain, snow, or wet soil. In cold climates, the freeze-thaw cycles can exacerbate the issue, causing bricks to crack and flake.
Even in warmer areas, poor brick quality or workmanship can lead to spalling.
Moisture Infiltration Issues
When moisture infiltrates brickwork, it can lead to serious spalling problems. You mightn’t realize it, but every time rain or snow hits your home, moisture can seep into the bricks. This water penetration weakens the brick structure, making it susceptible to cracking and crumbling. If you haven’t considered waterproofing solutions, now’s the time. By preventing deterioration early on, you can save yourself a lot of hassle and expense down the line.
Improper drainage is a common culprit. When water doesn’t flow away from your home properly, it pools around the foundation and the lower bricks. This standing water is a recipe for disaster. You need effective sealing techniques to safeguard against moisture. Make sure your home’s sealants are up to the task; otherwise, you’re inviting trouble.
Poorly sealed areas are an open invitation for moisture to wreak havoc. Addressing these issues is essential for maintaining the structural integrity of your brickwork. Remember, the goal is to keep your home safe and sound.
Freeze-Thaw Cycles
Another major factor contributing to brick spalling is the freeze-thaw cycle, where water trapped in the bricks freezes and expands. This process exerts pressures ranging from 25,000 to 114,000 PSI on the brick’s structure, causing it to crack and eventually spall. Each time water within the bricks freezes and thaws, it expands and contracts, leading to gradual damage over time.
To protect your home’s structural integrity, it’s important to understand preventive measures and repair techniques. Start by ensuring proper drainage around your property. This will minimize water infiltration, reducing the risk of freeze-thaw damage.
Regularly inspect and maintain your brickwork, looking for any signs of wear or cracks where water can seep in.
Consider using water-repellent sealants as another layer of defense. These sealants can help keep moisture out, thereby lowering the chances of freeze-thaw cycles wreaking havoc on your bricks.
If you’re already dealing with spalling, immediate repair techniques such as repointing and replacing damaged bricks are essential to maintaining your home’s structural integrity.
Necessary Tools and Materials
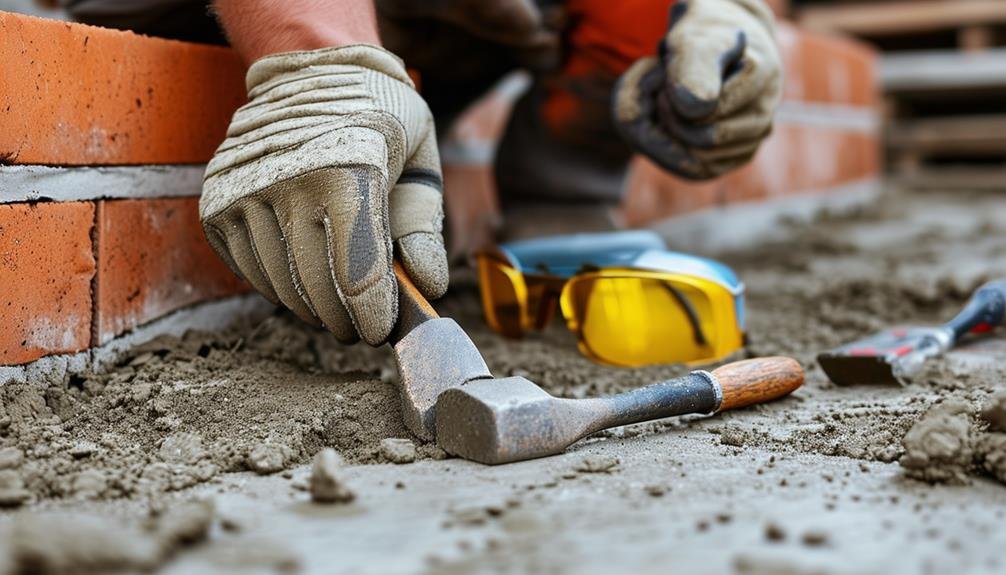
You’ll need a chisel, hammer, wire brush, mortar, and trowel to effectively repair spalling bricks. These essential tools will help you remove damaged pieces and apply new mortar smoothly.
Guaranteeing good tool maintenance is key—keeping your chisel sharp and your wire brush clean will make your job easier and your repairs more precise. For the best results, source your materials from reputable suppliers. High-quality mortar mix and new bricks can make a world of difference in the durability and appearance of your repair.
DIY repairs can be satisfying, but it’s important to have the right protective gear, like gloves and safety goggles, to keep yourself safe. For those who aren’t comfortable tackling the job themselves, professional services are available to ensure a flawless finish.
However, if you’re confident in your skills and have the right tools and materials, DIY repairs can save you money and give you a sense of accomplishment.
Having everything you need on hand before you start will save you time and stress. Proper preparation guarantees a smooth, professional-looking restoration, helping your home look its best and maintaining its structural integrity.
Removing Damaged Bricks

With your tools and materials ready, it’s time to focus on carefully removing the damaged bricks. Start by placing your chisel at the mortar joint around the damaged brick. Use a hammer to gently tap the chisel, breaking away the mortar.
It’s an important process, but remember, taking your time ensures a cleaner removal and prevents unnecessary damage to surrounding bricks. This step is vital for successful DIY repairs and long-term brick maintenance.
Once the mortar is sufficiently chipped away, gently wiggle the brick free. If it resists, don’t force it. Instead, continue chiseling around the edges until it releases. Your patience here will pay off, ensuring a smooth removal process.
Keep in mind, the goal is to create a clean space for the new brick installation.
If at any point you feel unsure, remember that seeking professional assistance can offer a cleaner, more precise finish. It’s important to balance your enthusiasm for DIY repairs with the need for quality brick maintenance.
Removing damaged bricks might seem challenging, but with care and precision, you’re laying the groundwork for a successful repair that blends seamlessly into your home’s façade.
Cleaning and Preparing the Area
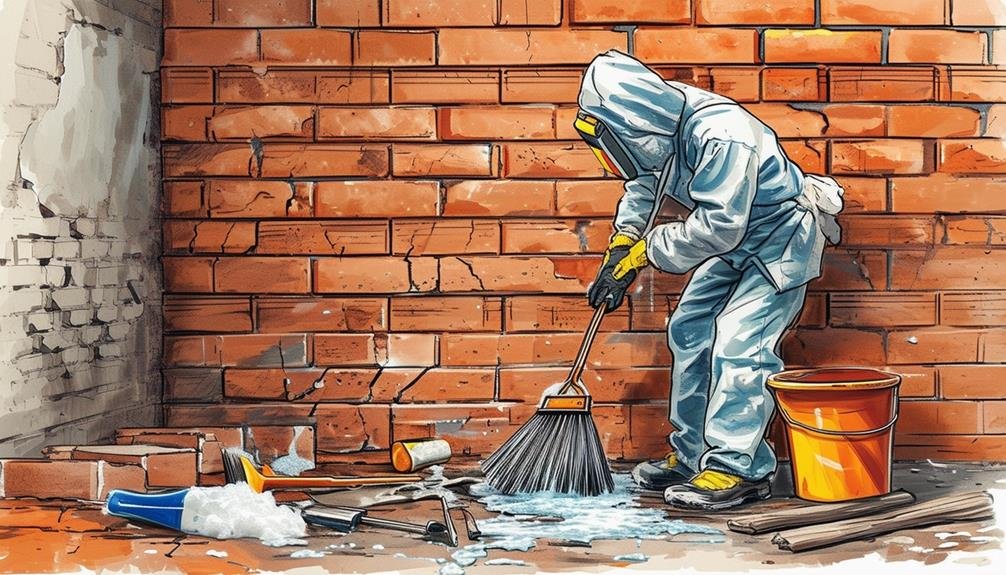
To ensure a successful repair, start by thoroughly cleaning the spalling area to remove all loose material, dirt, and debris. This step is essential for proper surface preparation and ensuring strong bond strength when you apply new mortar and bricks. Use a wire brush to scrub away any loose particles, and don’t hesitate to use a chisel or hammer for tougher spots.
Your goal is to create a clean, smooth surface that will allow the new materials to adhere properly. Effective cleaning techniques are important. Begin with a wire brush to tackle most of the loose debris. For more stubborn material, a chisel and hammer will help you get it out. Pay special attention to corners and crevices where dirt and debris might hide.
Removing all loose material and debris not only helps with surface preparation but also provides a stable base for your new bricks and mortar. This step may seem tedious, but it’s necessary for the integrity of your repair work. By ensuring the area is spotless, you’re setting the stage for a repair that will last and blend seamlessly with the existing structure.
Installing New Bricks
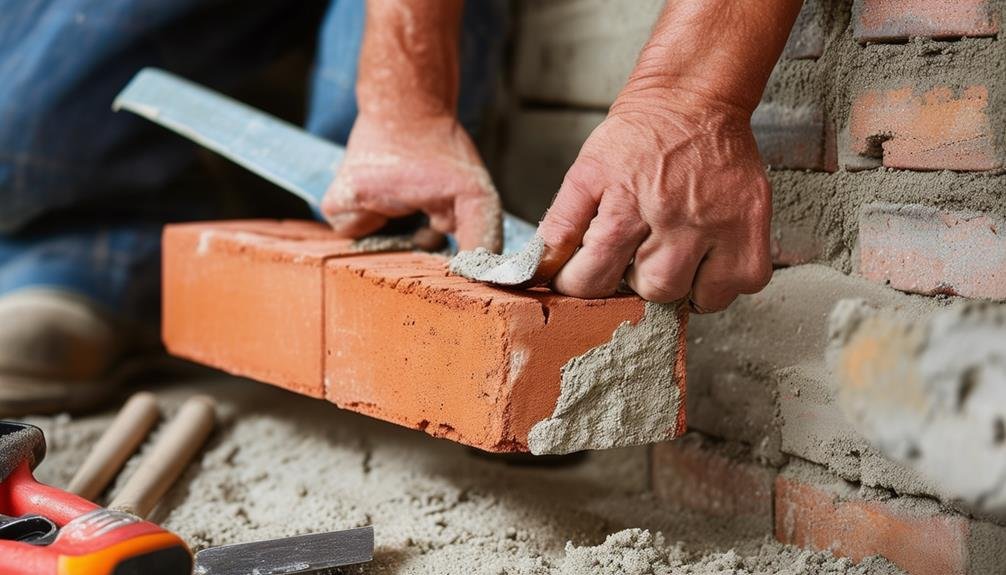
Now that your area is clean, start by selecting bricks that match the existing ones in color and size.
Prepare a mortar mix that complements the original mortar for a uniform look.
Place the new bricks carefully, ensuring proper alignment and spacing for a seamless repair.
Selecting Matching Bricks
Finding bricks that seamlessly blend with your existing ones involves considering size, color, texture, and style. When it comes to brick color matching, bring a sample of your existing bricks with you to the supplier. This way, you can directly compare the options available and guarantee a close match. Don’t forget to take into account the age and weathering of your current bricks, as this can impact the final appearance.
Texture comparison is equally crucial. The surface texture of bricks can vary greatly, from smooth to rough, and getting this right will help maintain the aesthetic continuity of your wall. Take your time to feel and examine the texture of potential new bricks against your sample.
Explore various brick suppliers or salvage yards that offer a wide variety of brick options. This increases your chances of finding the perfect match. Consulting with a masonry professional can also be beneficial. They often have the experience and trained eye to pinpoint the best bricks for your project.
Preparing Mortar Mix
When preparing a mortar mix for your spalling brick repair, you’ll want to start with a 3:1 mixture of sand to mortar. This balance guarantees a durable bond while maintaining the workability you need.
Begin the mixing process by adding the dry ingredients first. Gradually introduce water to the mix, stirring consistently to reach a thick but workable consistency. Remember, the consistency is vital; too thick, and it won’t spread well, too thin, and it won’t hold your bricks securely.
Mix the mortar thoroughly to achieve uniformity. This step is essential to make sure that every part of your repair is strong and cohesive.
Once the mortar is ready, you can focus on the application techniques. Whether you use a mortar bag or a trowel, the key is to fill the joints completely and evenly.
Keep an eye on the workability requirements throughout the process. If the mortar starts to harden too quickly, add a small amount of water to maintain its pliability.
Allow the mortar to set and cure properly as per the manufacturer’s instructions. This ensures a solid, lasting repair that will make your brickwork look as good as new.
Proper Brick Placement
Ensuring proper brick placement is vital to prevent future spalling and achieve a durable repair. When you’re installing new bricks, it’s important to pay close attention to brick alignment and spacing. Consistent alignment and proper spacing not only make your wall look professional but also guarantee the structure’s integrity. Use a level and spacing tools to maintain uniformity during installation. These tools help you achieve the right leveling techniques, ensuring each brick is evenly laid.
Here’s a quick guide to help you with the process:
| Step | Description |
|---|---|
| 1. Brick Alignment | Align each brick with the adjacent ones using a level. |
| 2. Spacing Tools | Use spacers to maintain consistent gaps between bricks. |
| 3. Mortar Application | Apply mortar evenly to guarantee strong adhesion. |
| 4. Leveling Techniques | Check with a level tool after placing each brick. |
Proper mortar application is paramount for strong adhesion and durability. You might also consider using brick ties or anchors for added stability, especially in high-stress areas. Don’t rush—adequate curing time for the mortar is essential. Allow the new bricks to settle and bond effectively to ensure a long-lasting repair. By following these steps, you’ll create a sturdy, well-aligned structure that stands the test of time and weather.
Frequently Asked Questions
Can You Fix Spalling Brick?
Yes, you can fix spalling brick by sealing bricks and controlling moisture. You’re part of a community that values home care, so don’t hesitate to take action or seek professional advice for extensive damage.
What Causes Spalling Bricks?
You’ll find spalling bricks are often caused by moisture infiltration and freeze-thaw cycles. When water seeps into bricks and then freezes, it expands, causing the bricks to break apart, making your home look unwelcoming.
What Does Brick Spalling Look Like?
When inspecting for brick spalling, you’ll notice flaking, crumbling, or peeling surfaces. Use inspection techniques to spot cracks or chips. Applying protective coatings can prevent further damage, ensuring your masonry structure stays strong and intact.
How Much to Repair Spalling Bricks?
You’ll find the Spalling bricks repair costs ranges from $500 to $1500. Cost factors include the extent of damage and materials. Investing in professional services guarantees quality work, promoting a secure, long-lasting home.
Conclusion
To sum up, addressing spalling brick repair yourself is entirely achievable with the right approach.
By identifying the damaged bricks, understanding the causes, and using the correct tools and materials, you can restore your brickwork to its former glory.
Remember to clean and prepare the area thoroughly, and carefully install new bricks with a matching texture and durable mortar.
With attention to detail and proper techniques, you’ll guarantee a long-lasting and aesthetically pleasing repair.