
To repair a chimney cap in Vaughan, Ontario, start by evaluating the damage, looking for cracks, rust, or missing sections that could compromise the chimney's functionality and safety. Next, remove the old cap safely, noting the assembly if it's a multi-section cap, and clean the chimney surface thoroughly to prevent debris and creosote buildup. Then, measure the flue dimensions for a proper cap size and choose durable materials like stainless steel or copper. Secure the new cap with screws or masonry adhesive, ensuring an overhang to direct rainwater away. Professional inspections can help you identify small issues before they become major problems, so keep exploring for more detailed guidance.
Assessing Chimney Cap Damage
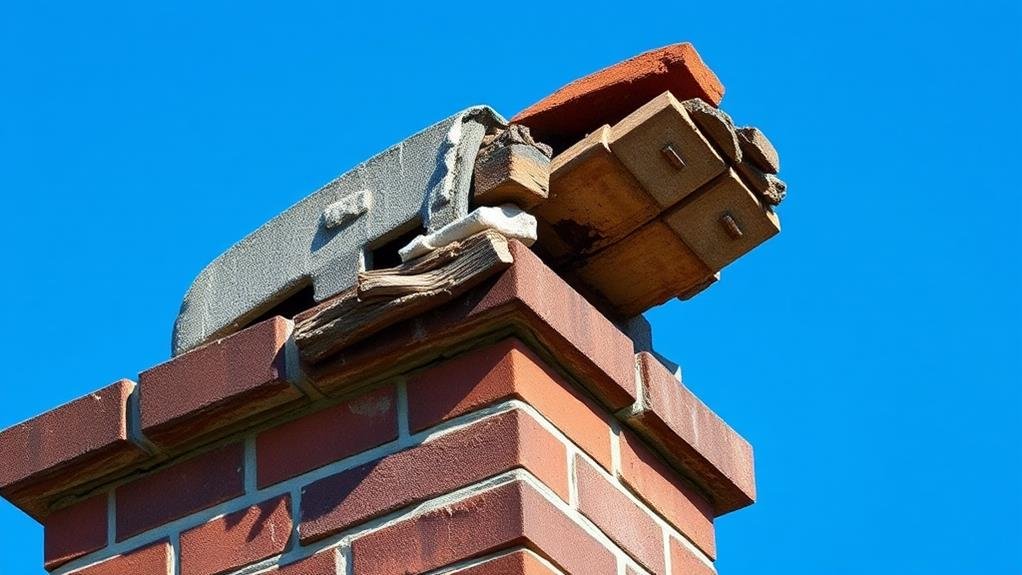
To assess chimney cap damage, start by inspecting the cap for visible cracks, chips, or missing sections. These defects can compromise the cap's ability to protect the chimney, allowing moisture and debris to infiltrate and cause further damage.
Check the cap's material; if it's made of metal, look for signs of rust or corrosion, which indicates deterioration that could lead to leaks. Inspect the surrounding areas for water stains or damage, which may suggest that the cap is failing to prevent water infiltration.
Next, evaluate the fit of the chimney cap. It should sit securely on the chimney without gaps that could allow debris or animals to enter. A poorly fitted cap can also be a sign of previous damage or improper installation.
Conducting a thorough inspection at least annually, especially before the fireplace season, is essential to catch any potential issues early. This proactive approach will help prevent costly repairs and guarantee the chimney remains safe and functional.
Regular inspections will also help identify any necessary repairs or replacements, safeguarding your home and family.
Removing the Old Cap
Having assessed the chimney cap damage and identified the need for repair, you're ready to proceed with removing the old cap. This step is vital in guaranteeing a secure fit for the new cap.
To start, make sure your safety by using a sturdy ladder and wearing protective gear to prevent accidents. Carefully inspect the cap for any screws or fasteners that need to be unscrewed or removed to detach it from the chimney structure.
If the old cap is stuck due to rust or debris accumulation, use a pry bar or similar tool to gently loosen it. For caps made of multiple sections, take note of how they're assembled to facilitate the installation of the new cap.
Once you've removed the old cap, clean the area around the chimney top thoroughly. This preparation is fundamental for a secure fit of the new cap, which will prevent future water infiltration.
Take your time and proceed methodically to guarantee a smooth changeover to the next step of the repair process.
Cleaning the Chimney Surface

Your chimney's surface is essential to its overall performance and longevity, making regular cleaning a must. It prevents the buildup of debris and creosote, which can lead to blockages and chimney fires.
Regular cleaning can also enhance the lifespan of the chimney cap by preventing moisture retention and deterioration from harmful substances.
To clean the surface effectively, use a stiff brush and a vacuum designed for chimney cleaning. This will help remove soot and debris efficiently.
It's recommended to conduct this cleaning at least once a year, ideally before the heating season begins, to guarantee peak chimney performance.
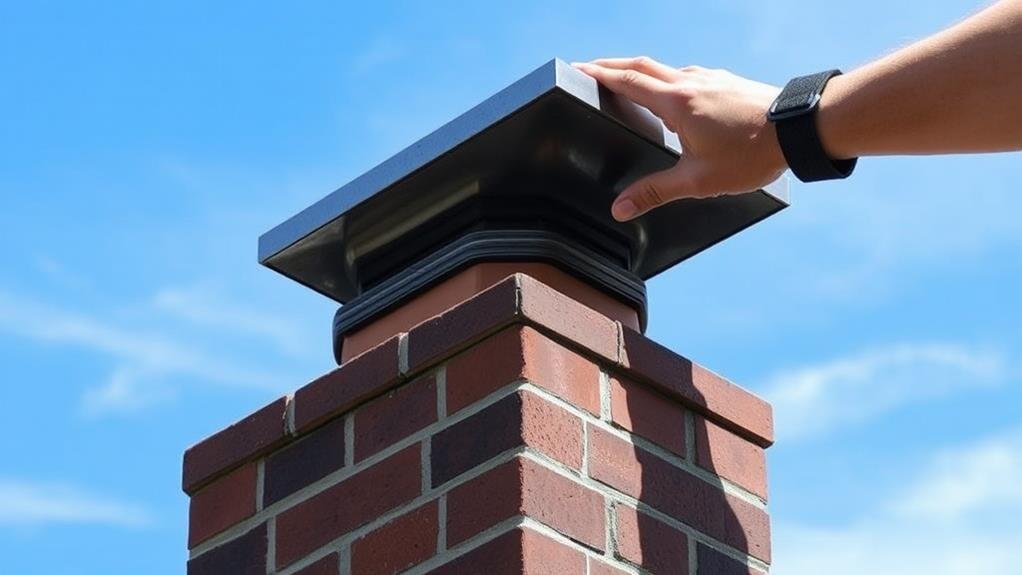
Installing a New Cap
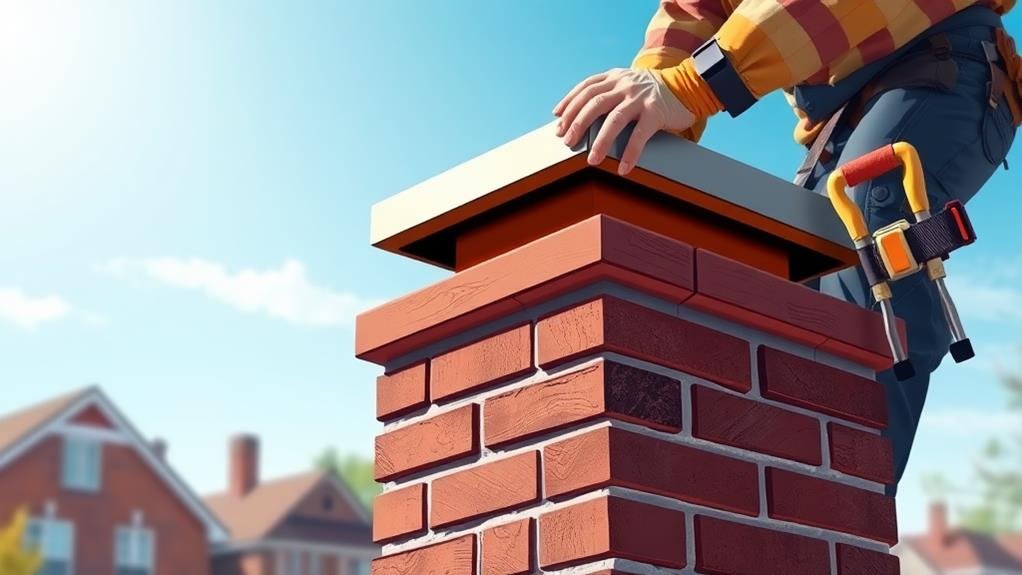
A new chimney cap is more than just a protective cover; it's an essential component in maintaining the integrity and longevity of your chimney.
To guarantee a proper fit, start by measuring the dimensions of your chimney flue. Use these measurements to select a replacement cap that matches your needs.
When choosing the material for your new cap, consider using stainless steel or copper, as these materials enhance durability and prevent rust and corrosion over time.
Secure the new cap to the chimney flue using screws or masonry adhesive, making sure it fits snugly to prevent water infiltration and blockages.
It's also vital to check that the cap has a proper overhang to effectively direct rainwater away from the chimney structure.
Regular inspections, ideally during annual chimney checks, will help guarantee the new cap remains intact and functional.
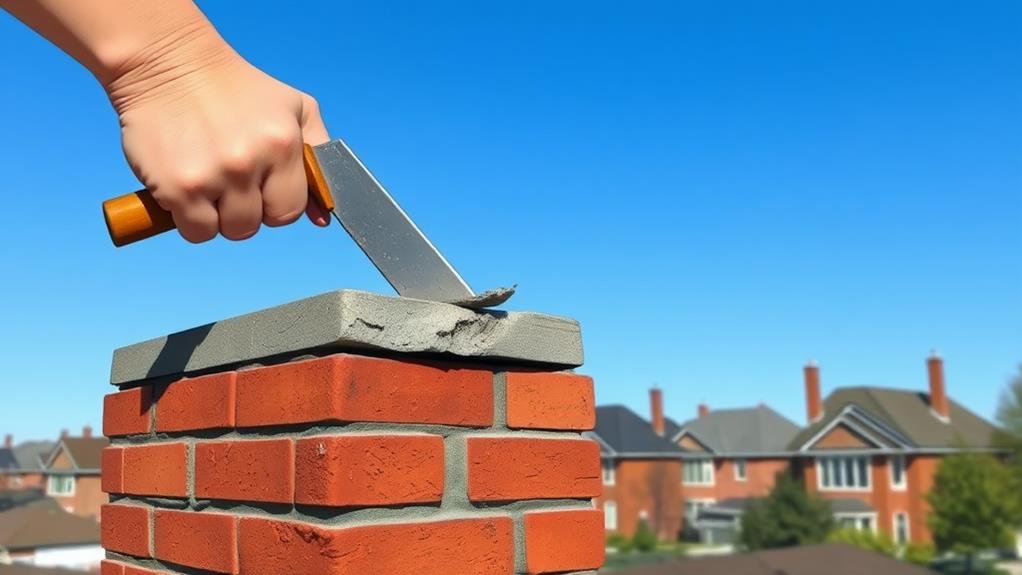
Sealing Gaps and Joints
To guarantee the long-term integrity of your chimney cap, effectively sealing any gaps and joints is essential. This step is vital in preventing water infiltration, which can lead to significant structural damage over time.
By sealing these gaps, you not only protect the chimney but also enhance its overall efficiency by reducing the risk of smoke backdrafts and heat loss.
To achieve this, use a high-quality silicone caulk or masonry sealant specifically designed for outdoor use. Verify the surface is clean and dry before applying the sealant; moisture or debris can compromise the bond and effectiveness of the seal.
Regular inspections are necessary to identify new gaps that may form due to weathering or temperature fluctuations, especially during Vaughan's freeze-thaw cycles.
Ensuring Secure Fitment
How secure is your chimney cap's fitment? It's essential to guarantee that the cap fits snugly over the chimney flue to prevent water and debris from entering. A well-fitted cap is key to maintaining the integrity and safety of your chimney.
You should start by confirming the chimney cap is the correct size for your chimney flue. A cap that's too small will leave gaps, while one that's too large may not stay in place properly.
Once you have the right size, secure the cap firmly to the flue using stainless steel screws or bolts. These materials are resistant to rust and corrosion, providing a durable connection.
After installation, apply a high-quality sealant around the edges of the cap to enhance waterproofing and prevent leaks.
Regularly inspect the fitment during annual maintenance checks to identify any loosening or damage that may require immediate attention.
It's also advisable to hire a professional for installation or repair to guarantee proper fitment and adherence to local building codes. This proactive approach will help safeguard your chimney and prevent costly repairs down the line.
Professional Inspection and Safety
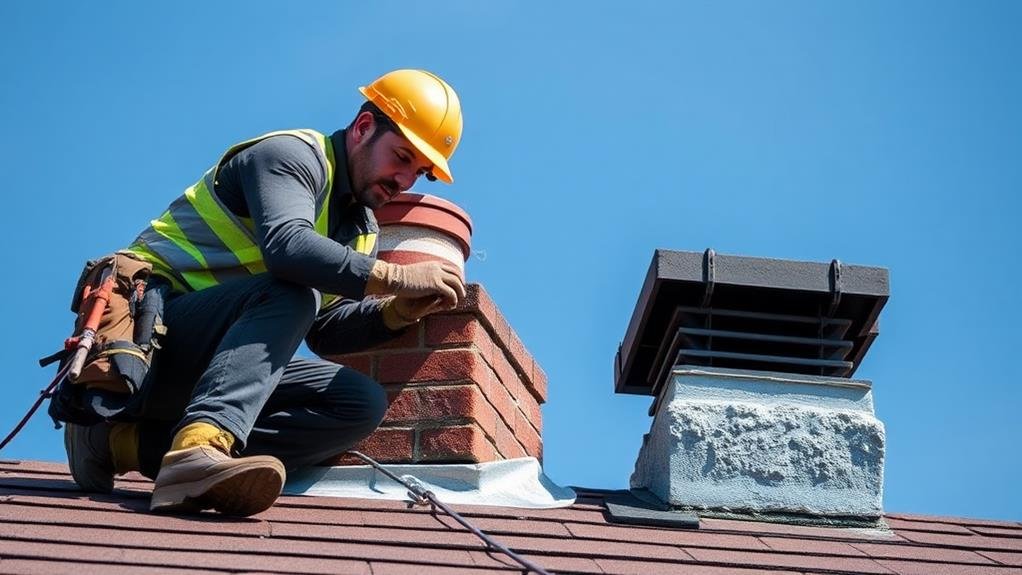
Securing a snug fitment for your chimney cap is just the beginning; guaranteeing its ongoing integrity and safety demands regular professional inspections.
Annual inspections are essential to identify damage or deterioration in the chimney cap, which can prevent costly repairs down the line. Certified chimney professionals conduct thorough assessments to guarantee the safety and functionality of the chimney cap, addressing issues before they escalate.
These inspections help detect small cracks or wear that may compromise the chimney cap's integrity and lead to water infiltration.
Regular inspections also guarantee that the chimney cap remains securely in place, protecting against weather damage and debris buildup. This enhances overall chimney safety and efficiency.
By hiring professionals with extensive experience and knowledge in Vaughan, Ontario, any necessary repairs or replacements are handled effectively, guaranteeing that your chimney cap remains safe and functional for years to come.
Professional inspections are a proactive step towards maintaining your chimney's health and safety.
Frequently Asked Questions
How Much Does It Cost to Repair a Chimney Top?
You'll spend anywhere from $200 to $700 to repair a chimney top, depending on the extent of damage, materials used, and accessibility. Regular maintenance and timely repairs can save you from incurring higher expenses down the line.
How Do You Fix a Chimney Cap?
To fix a chimney cap, you'll assess the damage, remove the old cap, clean the area, measure for a new cap, install it with screws or adhesive, and seal with waterproof sealant to prevent leaks and blockages.
How Much Does It Cost to Put a Chimney Cap on a Chimney?
You can expect to pay around $449 or more to install a chimney cap, depending on the material and labor involved, with stainless steel caps being pricier but offering better durability and weather resistance.
How Do You Replace a Chimney Rain Cap?
To replace a chimney rain cap, you'll safely access the roof, remove the old cap, measure the flue for a snug fit, secure the new cap with screws or brackets, and seal the edges to prevent water infiltration.
In Closing
Successfully Repairing Your Chimney Cap
You've now gained the knowledge to repair your chimney cap in Vaughan, Ontario, ensuring your home's safety and structural integrity. By accurately evaluating damage, properly removing the old cap, thoroughly cleaning the chimney surface, installing a new cap, sealing gaps and joints, and ensuring a secure fitment, you protect your property from water damage and costly repairs. Regular inspections and professional help when needed are essential. With these steps, you maintain your chimney's functionality and aesthetic appeal.