To repair a chimney cap in Hamilton, Ontario, you'll need to inspect the cap for cracks, rust, or wear, and assess the mortar joints and surrounding surfaces for potential water damage. Choose durable materials like stainless steel or copper that resist rust and extreme temperatures. When removing the old cap, use a sturdy ladder and appropriate safety gear, and take care not to damage the chimney. For installation, guarantee a tight seal with high-quality silicone or masonry sealant. Regular inspections and maintenance are essential to prevent water leaks and safety hazards. By following these steps, you'll be on your way to a secure and efficient chimney system.
Chimney Cap Repair Essentials
When it comes to chimney cap repair, evaluating damage is essential for maintaining proper ventilation and preventing water intrusion, which can compromise chimney functionality and safety.
Regular inspections can help identify issues like rust, cracks, or missing caps, which can lead to significant chimney and fireplace damage if not addressed promptly.
Professional chimney cap repair services typically include the replacement of damaged caps and sealing to protect against harsh weather conditions, ensuring long-lasting durability.
Using weather-resistant materials for chimney caps is vital as they prevent costly repairs and water damage while allowing smoke and gases to exit safely.
Custom chimney cap solutions can also be tailored to fit specific chimney designs and prevent animal intrusion, enhancing both safety and efficiency in your home.
Assessing Chimney Damage
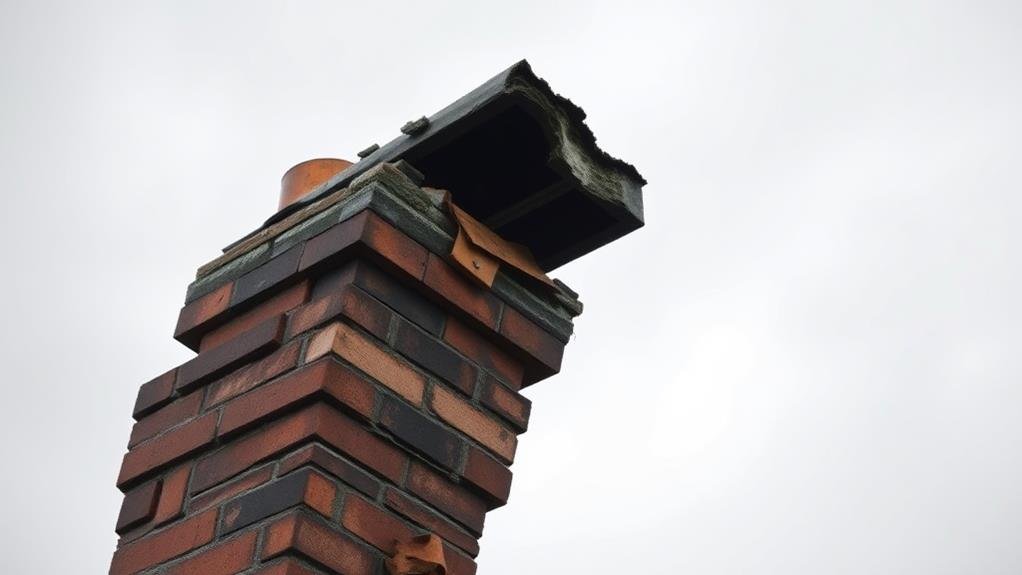
To effectively repair a chimney cap, you must first assess the extent of the damage. Start by inspecting the chimney cap for visible cracks, rust, or signs of wear that could compromise its integrity and function.
Look for any gaps between the chimney cap and the chimney structure, which may indicate water infiltration risks. Debris buildup or blockages on the cap could restrict airflow and lead to smoke or gas issues, so be certain to check for these as well.
Assess the condition of the mortar joints and the overall alignment of the chimney cap to guarantee it fits securely.
Monitoring for signs of water damage or staining on surrounding surfaces can suggest a failing chimney cap that requires repair. Taking a thorough inventory of these potential problems will help you determine the necessary steps to restore your chimney cap to its ideal state.
This initial assessment is essential in planning an effective and safe repair process.
Choosing Durable Materials
Durable materials are the backbone of any successful chimney cap repair. When selecting materials for your chimney cap in Hamilton, Ontario, you need to take into account their durability and resistance to harsh weather conditions.
Opt for stainless steel or copper, as these materials are known for their resilience and ability to withstand rust and corrosion.
For added durability, choose a chimney cap made from heavy-gauge metal. This will guarantee that the cap can handle extreme temperatures and provide long-lasting protection against the elements.
Additionally, selecting a cap with a powder-coated finish can enhance longevity by adding an extra layer of protection against UV rays and moisture damage.
Make sure that the materials you use have been tested for high-temperature resistance, as they need to safely handle the heat produced by the fireplace.
Look for chimney cap options that include mesh screens to prevent animal intrusion while maintaining airflow, ensuring both functionality and durability.
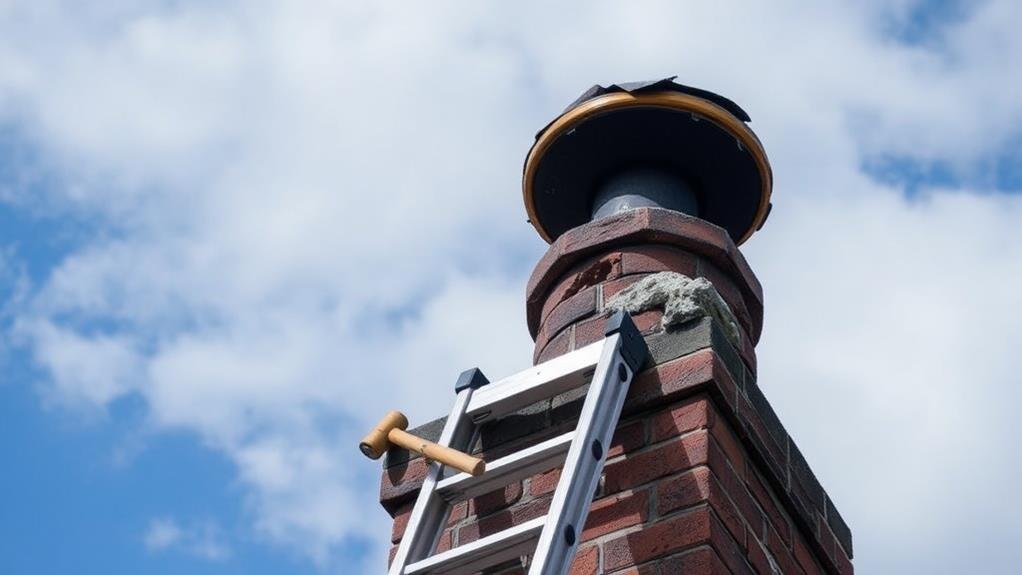
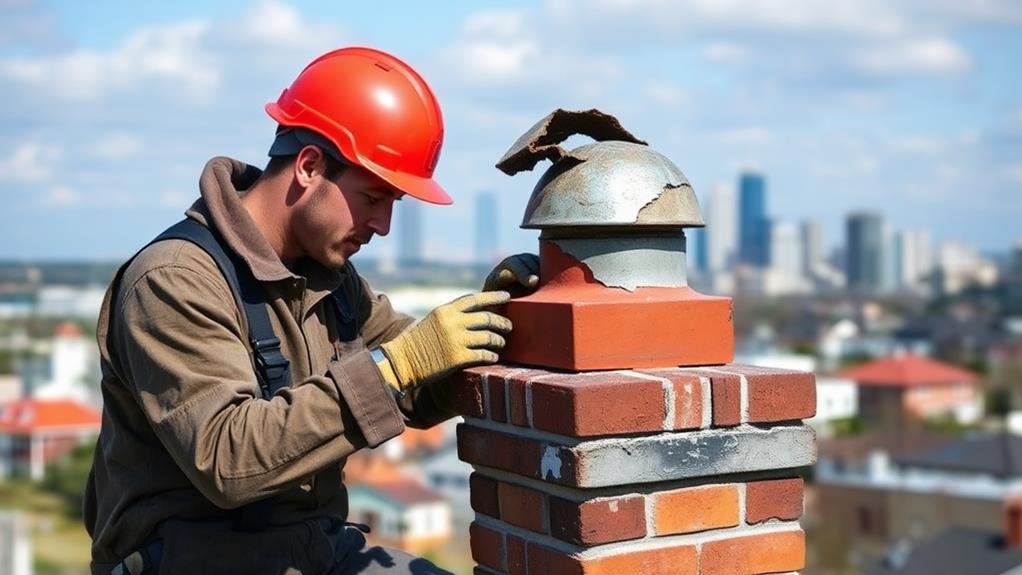
Removing Old Caps
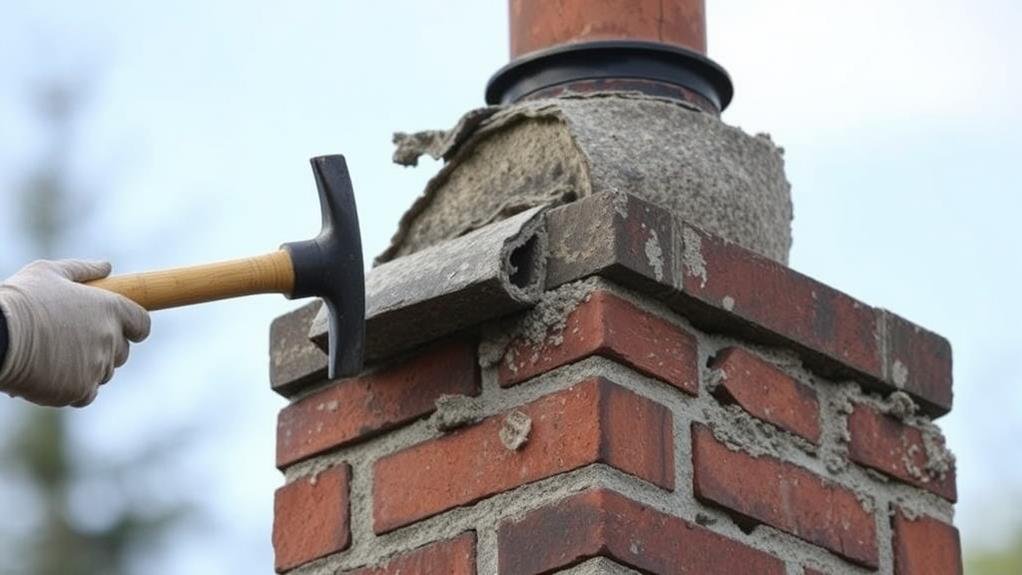
You're about to begin an important step in chimney cap repair: removing the old cap. Safety is paramount, so make sure you're using a sturdy ladder and wearing appropriate safety gear. This work involves heights and heavy materials, so caution is vital.
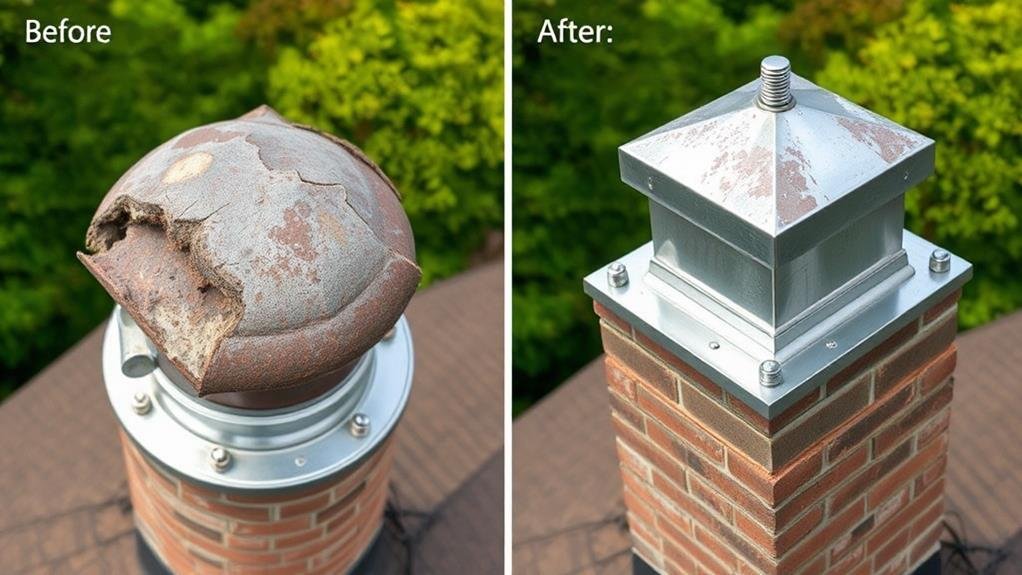
Carefully inspect the old chimney cap for signs of rust or corrosion. If you find any, it might be necessary to replace the cap entirely rather than just repair it.
To remove the cap, gently break the mortar seal around it with a chisel and hammer. Be cautious not to damage the chimney structure itself. If the chimney cap is secured with screws, use a power screwdriver to remove them, keeping the screws in a safe place for potential reuse.
Once the old cap is removed, thoroughly clean the chimney surface to prepare for the new cap installation. This guarantees a proper seal and fit, which is important for the chimney's functionality and safety.
Take your time and work methodically to avoid any complications during this critical step. Proper removal of the old cap lays the foundation for a successful chimney cap repair.
Safety Precautions
Safety precautions for chimney cap repair are inseparable from the actual removal and installation process. When starting any repair work, always verify the chimney is completely cool to prevent burns or injuries from heat or sparks. This essential step should never be overlooked, as it directly impacts your safety during the repair process.
As you prepare to climb, use a sturdy ladder and secure it properly to avoid falls while accessing the chimney cap. Furthermore, wear personal protective equipment, such as gloves and safety goggles, to protect against debris and sharp edges during the repair process. These simple precautions can greatly reduce the risk of injury.
If working at considerable heights, consider using a harness and safety gear to mitigate risks associated with falls. Additionally, having a helper on-site is advisable to assist with lifting heavy materials and to provide support in case of an emergency.
Installation Techniques
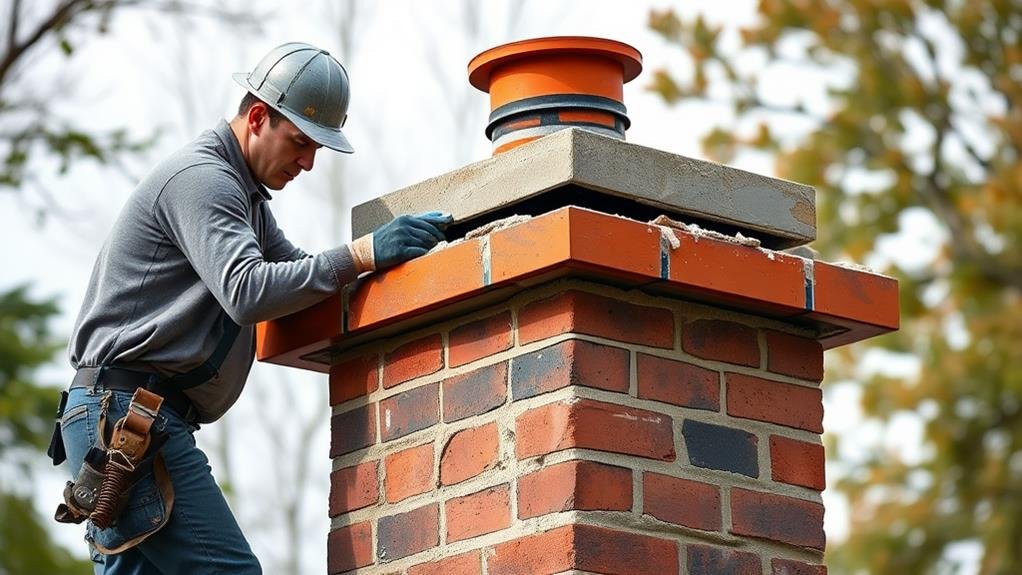
To successfully install a new chimney cap, you must start by removing the existing one. Begin by detaching any screws or bolts securing it to the chimney structure using a screwdriver or wrench. This step guarantees a clean slate for the new cap.
Next, thoroughly clean the chimney surface to guarantee a proper seal and fit for the new cap. Remove any debris, rust, or old mortar if necessary.
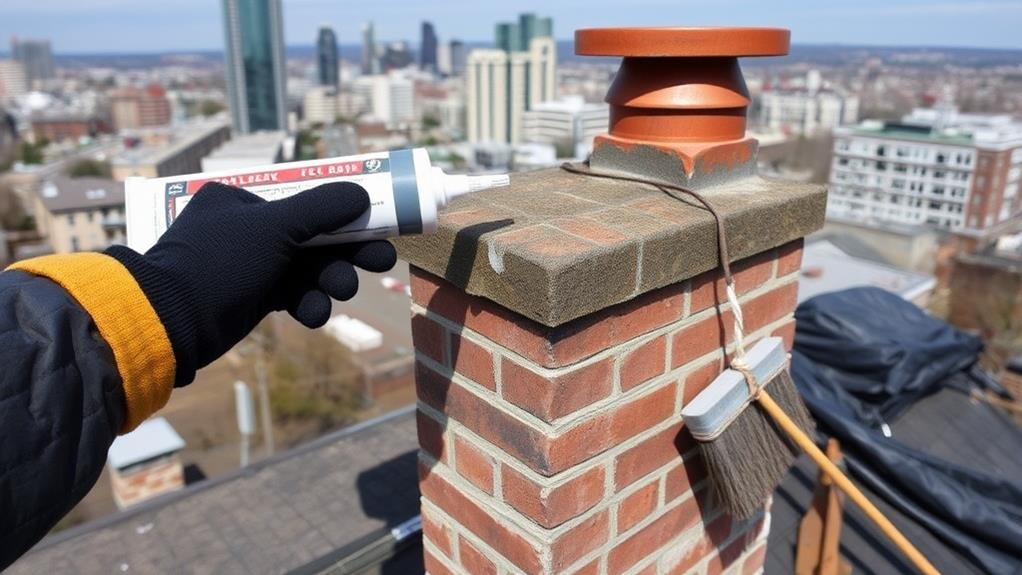
Then, apply a high-quality silicone or masonry sealant around the top edge of the chimney to create a weather-tight barrier. This is vital in preventing water and debris intrusion.
Position the new chimney cap over the flue, guaranteeing it fits securely and covers the entire opening. Secure the new cap in place by tightening screws or bolts, making sure it's firmly attached.
Verify the sealant has been applied evenly to prevent leaks. By following these installation techniques, you can effectively replace your chimney cap and safeguard your chimney's integrity.
Proper installation is key to guaranteeing a long-lasting and durable chimney cap.
Preventing Water Leaks
Securing a tight seal around your chimney cap is vital in warding off water leaks, which can lead to extensive structural damage. A properly installed chimney cap prevents water from entering the chimney flue.
Regular inspections are important; even small gaps in the cap can allow rainwater to penetrate and cause leaks. To enhance the cap's ability to divert water, use waterproof sealants or flashing around its base. Confirm the cap is fitted securely and has a slight overhang to direct rainwater away from the chimney and roof.
Conduct routine maintenance and cleaning of the chimney cap to remove debris that can cause blockages, leading to water accumulation and leaks. Check for cracks or deterioration, and address these issues promptly to prevent further damage.
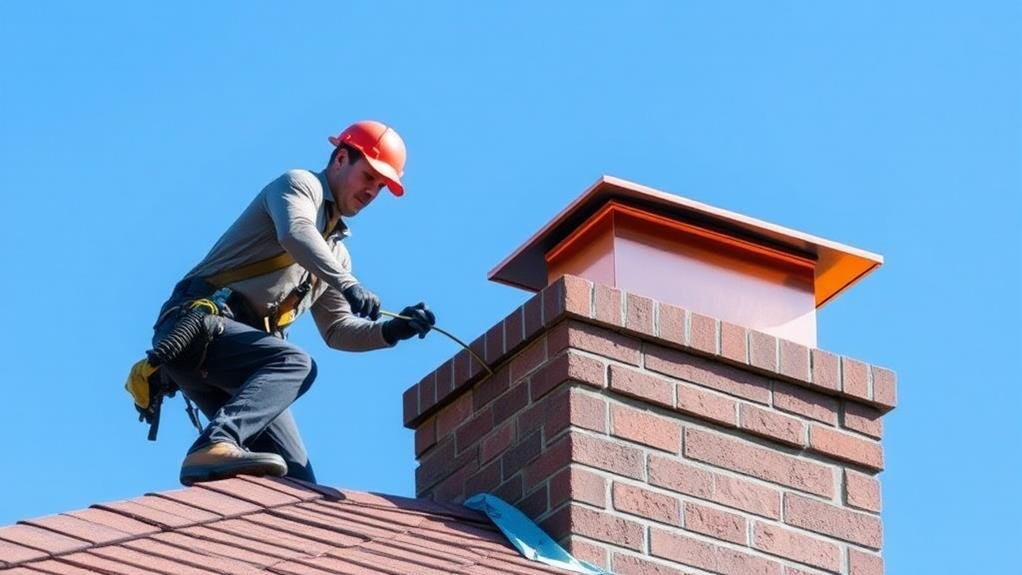
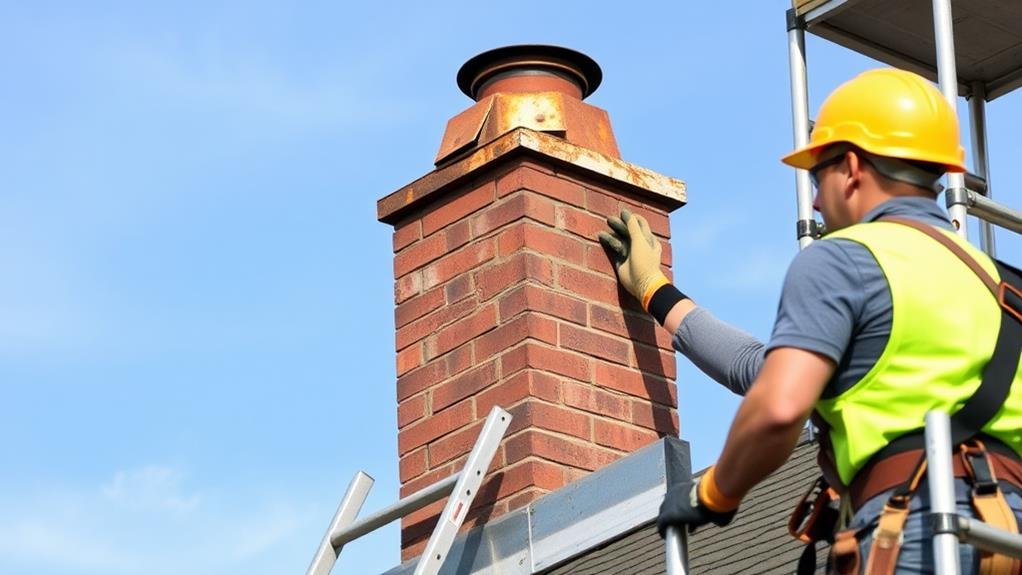
Hiring a Professional
When dealing with chimney cap repairs, hiring a professional makes a significant difference in guaranteeing the longevity and safety of your chimney. By engaging a licensed contractor, you guarantee that the repair complies with local regulations and standards, protecting you from unqualified service providers.
Professionals possess the necessary tools and expertise to safely remove and replace chimney caps, minimizing the risk of further damage to the chimney structure.
In Hamilton, Ontario, a professional contractor can provide a detailed assessment of the chimney cap's condition, identifying any underlying issues that may require attention beyond the cap itself. This expertise leads to a more efficient repair process, as they can schedule the work during ideal weather conditions, typically in spring or fall.
Additionally, professional services often include warranties on workmanship, offering peace of mind regarding the durability and reliability of the repair. By hiring a professional, you can rest assured that the job will be done correctly and safely.
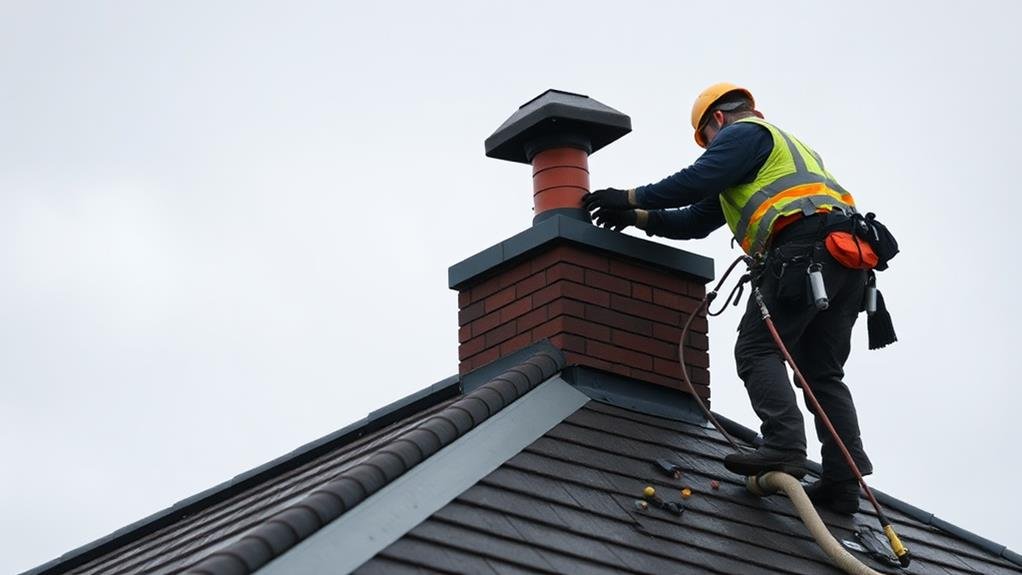
Maintenance Tips
Regular inspections of your chimney cap are essential for maintaining the integrity and safety of your chimney system. You should regularly inspect for signs of rust, damage, or deterioration, as these issues can compromise its effectiveness and allow moisture to enter the chimney system.
Clean the chimney cap periodically to remove debris, leaves, and animal nests, which can obstruct airflow and lead to potential hazards in your fireplace.
Make certain that the chimney cap is properly fitted and securely attached to the chimney structure to prevent it from being dislodged by strong winds or heavy snowfall.
Consider using a professional service for annual inspections and maintenance, as they can identify and address issues that may not be visible to the untrained eye.
Additionally, promptly replace any damaged or missing chimney caps to protect against water intrusion, animal intrusions, and to maintain the overall efficiency of your chimney system.
Frequently Asked Questions
How to Repair a Chimney Cap?
You'll need to inspect the chimney cap for damage, remove loose mortar with a chisel and hammer, apply a masonry adhesive or sealant, replace missing parts, and schedule regular maintenance to guarantee it remains in good condition.
How Much Does It Cost to Fix the Top of a Chimney?
Fixing the top of a chimney can cost you between $100 and $500, depending on the damage and materials used. Basic repairs like resealing or replacing a chimney cap start around $200, while extensive repairs can exceed $400.
Can You Replace Your Own Chimney Cap?
You can replace your own chimney cap, but it requires specific tools, safety gear, and knowledge of your chimney's structure to guarantee proper installation and functionality. However, improper installation can lead to serious issues.
How Much Does It Cost to Put a Chimney Cap on a Chimney?
Replacing a chimney cap can be pricey. You'll pay between $150 to $600, depending on the materials and complexity of the installation. Labor costs add another $100 to $300, making timely replacement a worthwhile investment.
In Closing
Repairing a chimney cap in Hamilton, Ontario, requires precision and attention to detail. By evaluating damage accurately, choosing durable materials, and adhering to safety precautions, you can guarantee a successful repair. Remember, installation techniques are essential to preventing water leaks and maintaining chimney integrity. If you're unsure, hiring a professional can provide peace of mind. Regular maintenance is key to extending the life of your chimney cap and guaranteeing your home remains safe and secure.